
Choose the Right Waterproofing Solution Based on Your Building's Condition
Waterproofing Solution for Building Conditions
Identify Your Roof Condition → Choose the Right Waterproofing Solution → Enjoy Long-Lasting Leak Protection
Every roof and building has unique waterproofing needs. Whether you’re dealing with roof leaks, water ponding, cracks, or an aging terrace, selecting the right Waterproofing Solution for Building Conditions is essential for long-term protection. This practical guide helps you identify your building’s condition and choose the most effective waterproofing solution to prevent leakage, dampness, and costly structural damage.
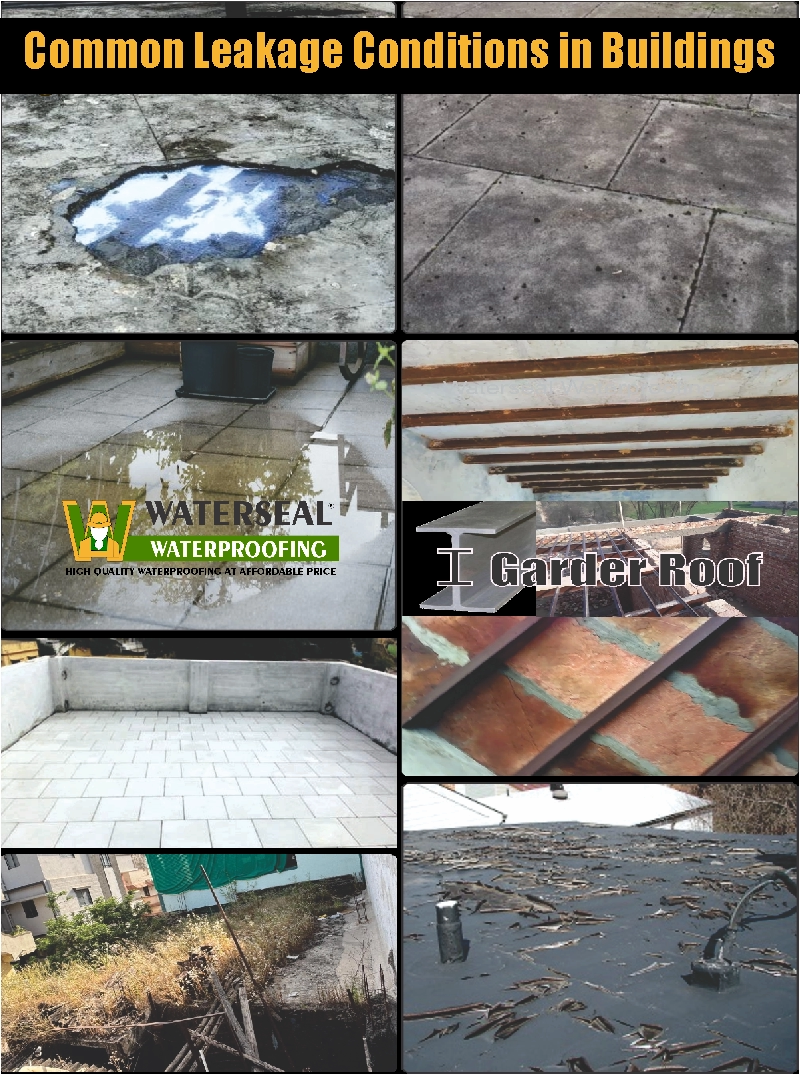
Why Is Choosing the Right Waterproofing Solution for Building Conditions Important?
Every building and roof has unique waterproofing challenges. Some roofs suffer from water leakage, while others experience water ponding, dampness, or surface cracks. Because every building is different, a single waterproofing method cannot provide the best results for every situation.
Choosing the right Waterproofing Solution for Building Conditions helps protect your property from roof leaks, moisture, and structural damage for many years. This guide will help you understand your building’s condition and select the most suitable waterproofing solution for long-lasting performance and reliable protection.
Choose a Waterproofing Solution Based on Your Building's Age and Construction Type
Before starting any waterproofing work, it is essential to understand your building’s age and construction type. Buildings constructed in different periods often use different construction methods, materials, and structural designs, which means their waterproofing requirements also vary.
Older buildings commonly have lower-quality concrete, weakened plaster, construction joints, and visible cracks that allow water to seep inside. In contrast, modern buildings usually feature RCC structures, proper roof slopes, and advanced construction materials, requiring a different waterproofing approach.
Whether your property is an old building, a newly constructed home, an RCC structure, or a conventional slab-based building, understanding its condition is the first step in selecting the right Waterproofing Solution for Building Conditions. Choosing the appropriate solution ensures long-lasting protection against water leakage, dampness, and costly structural repairs.
Why Is It Important to Assess Your Roof Before Waterproofing?
Before applying any waterproofing solution, it is essential to carry out a thorough assessment of your roof’s condition. If the roof has cracks, previous repair patches, water ponding, or an improper slope, applying waterproofing directly may not deliver long-lasting results.
Several factors—including the condition of the roof surface, the strength of the RCC slab, the condition of construction joints, and the efficiency of the rainwater drainage system—directly influence the selection of the most effective waterproofing solution.
Choosing the right Waterproofing Solution for Building Conditions based on your roof’s actual condition ensures that both repair work and waterproofing perform effectively, providing long-term protection against water leakage, dampness, and future structural damage.
Waterproofing Solution for Building Conditions: 7 Common Conditions of Old Roofs
Over time, most old roofs develop different types of waterproofing problems. Some roofs develop surface cracks, while others suffer from water ponding, damaged waterproofing coatings, or structural deterioration. Since every roof condition is different, applying the same waterproofing solution to every roof rarely delivers the best results.
Below, you’ll find the 7 most common conditions of old roofs along with the most suitable Waterproofing Solution for Building Conditions for each one. Identifying your roof’s condition before starting waterproofing will help you choose the right solution, ensuring long-lasting protection against roof leakage and moisture problems.
Note: Before beginning any waterproofing work, it is important to identify which of the following roof conditions matches your building. Selecting the correct Waterproofing Solution for Building Conditions is the key to achieving durable, leak-free, and long-lasting waterproofing results.
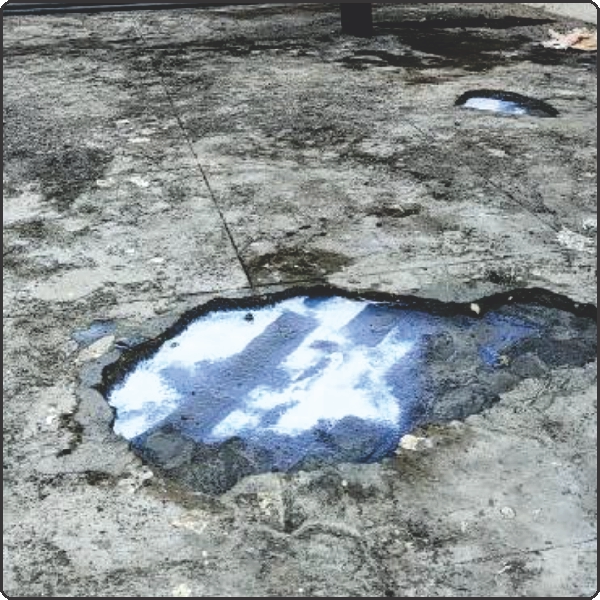
Recommended Repair Method: Before waterproofing, repair all damaged areas using cement plaster mixed with WaterSeal PSV. This creates a stronger bond, enhances plaster strength, reduces the risk of future cracks, and ensures the waterproofing coating adheres properly for long-lasting protection.
1. Cracks and Damaged Plaster on the Roof Surface
Old roof plaster often becomes weak, develops cracks, and starts peeling over time. These defects allow rainwater to penetrate the RCC slab, leading to leakage. Never apply waterproofing directly over damaged plaster.
Surface Preparation Before Waterproofing
- Remove all loose and damaged plaster.
- Clean and wash the roof surface thoroughly.
- Repair damaged areas using:
- 1 Bucket Cement
- 1 Bucket Sand
- 1 Bucket Screened River Sand
- 1 Bucket Small Concrete Aggregate (6–10 mm)
- Add 1 Liter WaterSeal PSV to 10 Liters Water for stronger bonding and improved water resistance.
Why Repair First?
Repairing damaged plaster creates a strong base for waterproofing, improves coating adhesion, and helps prevent future roof leakage.
Tip: Proper surface preparation is the key to long-lasting waterproofing.
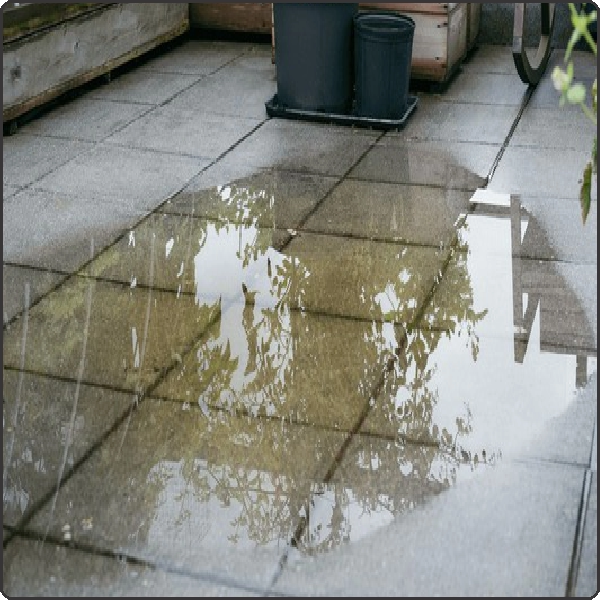
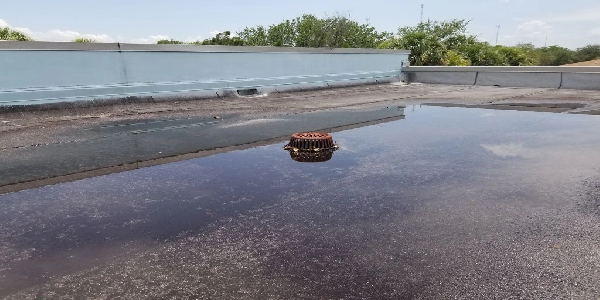
2. Ponding of Water on the Roof Surface
If your roof does not have the proper slope, rainwater collects on the surface and forms puddles. Standing water increases the risk of seepage and shortens the life of any waterproofing system. Therefore, ponding should always be corrected before waterproofing.
How to Correct Ponding
- Identify and mark the low areas where water collects.
- Remove loose plaster or weak mortar for proper bonding.
- Re-plaster the surface using:
- 1 Bucket Cement
- 2 Buckets Sand
- Add 1 Liter of WaterSeal PSV to 10 Liters of Water to improve bonding and water resistance.
- Create the correct slope (fall) towards the drain for proper rainwater drainage.
After the plaster has cured, apply a suitable Terrace Waterproofing Solution.
Why Slope Correction Matters
Standing water can damage even the best waterproofing coating over time. Correcting the roof slope allows rainwater to drain quickly, improves waterproofing performance, and helps prevent future leakage.
Tip: Always inspect roof drains and outlets for blockages before waterproofing. Many leakage problems are caused by poor drainage rather than waterproofing failure.
Pro Tip: If the joints are wide or deep, fill them in two layers to achieve better bonding and longer-lasting results.
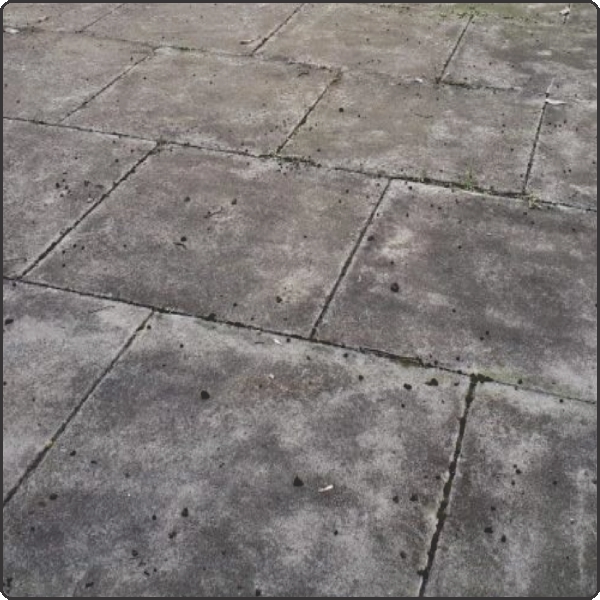
Open Joints Between Tiles or Stone Slabs
Over time, the joints between terrace tiles or stone slabs may open due to weather exposure and natural movement. These gaps allow rainwater to seep beneath the surface and eventually reach the RCC slab, causing leakage. Before applying waterproofing, all open joints must be properly sealed.
Step-by-Step Treatment
- Clean the joints thoroughly to remove dust, loose material, and dirt.
- Wash the surface with clean water and allow it to dry completely.
- Fill all open joints using a high-quality crack or joint filling compound.
- Allow the joint filler to cure completely before proceeding.
- Apply a suitable Terrace Waterproofing Solution for long-lasting protection.
Recommended Material
For durable joint sealing, use the WaterSeal Instant Crack Filler Kit. It provides strong adhesion, flexible sealing, and helps prevent water penetration through open joints.
Why Joint Sealing Is Important
Unsealed joints allow rainwater to penetrate beneath the tiles, leading to dampness, seepage, and gradual damage to the roof slab. Proper joint sealing blocks the water entry path and improves the performance and lifespan of the waterproofing system.
Pro Tip: Seal all inside corners and wall-floor joints before waterproofing. These are the first areas where terrace leakage usually begins.
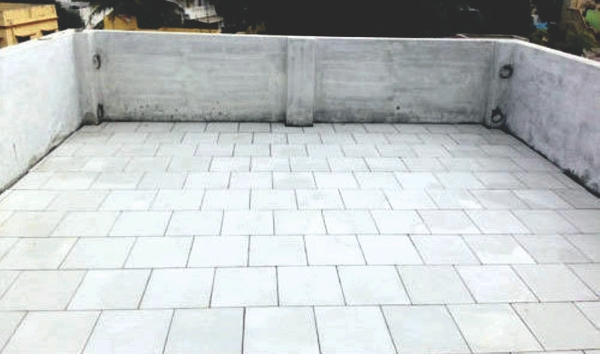
4. Seepage at the Joint Between the Parapet Wall and Roof Tiles
The junction between the parapet wall and roof tiles is one of the most common water leakage points on a terrace. If this joint is not sealed properly, rainwater penetrates through the gap and seeps into the RCC slab, causing dampness, wall damage, and interior leakage.
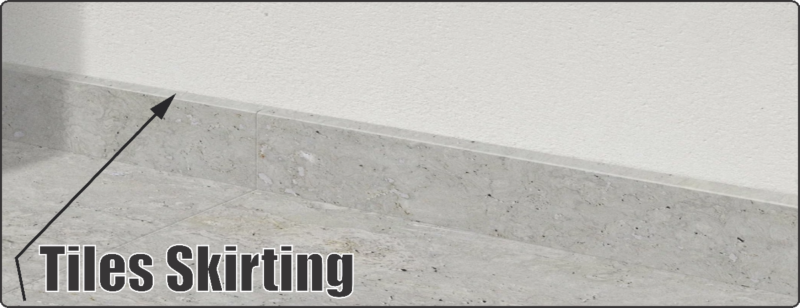
Installing a tile skirting or cement fillet before waterproofing creates a strong waterproof junction between the floor and the parapet wall, preventing water from entering this vulnerable area.
Step-by-Step Treatment
- Cut 3″ or 4″ tile strips to the required size for skirting.
- Fix the tile strips along the base of the parapet wall using a suitable mortar or adhesive.
- Ensure a continuous and well-bonded joint between the wall and the terrace floor.
- After the skirting has cured, apply the selected Terrace Waterproofing Solution over the roof surface.
Why Tile Skirting Is Important
Without tile skirting or a cement fillet, rainwater can collect in the wall-floor junction and gradually seep into the slab. A properly installed skirting blocks this water entry point, improves waterproofing performance, and extends the life of the waterproofing system.
5. Removing Old Waterproofing Layers
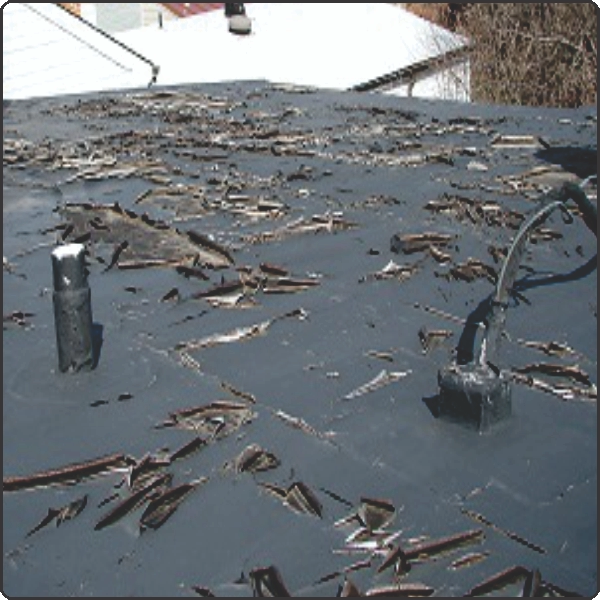
If the existing waterproofing coating has peeled, cracked, or deteriorated over time, it can no longer protect the roof from water leakage. Applying a new waterproofing layer over a damaged coating will not provide a durable result.
For long-lasting waterproofing, the old coating should be completely removed to expose a clean, solid surface that allows the new waterproofing system to bond properly.
Step-by-Step Procedure
- Remove all loose, damaged, or peeling waterproofing material using suitable hand tools or mechanical equipment.
- Clean the exposed roof surface thoroughly to remove dust, loose particles, algae, and old bitumen residue.
- Allow the surface to dry completely before starting waterproofing.
- Apply a fresh waterproofing system using WaterSeal PSV Premix according to the recommended application method.
Why Removing the Old Coating Is Important
Old waterproofing layers often trap moisture and prevent proper adhesion of the new coating. Removing the damaged layer creates a strong bonding surface, improves waterproofing performance, and extends the service life of the new waterproofing system.
Pro Tip: Never apply a new waterproofing coating over loose or peeling waterproofing. Always remove the failed layer completely for the best long-term results.
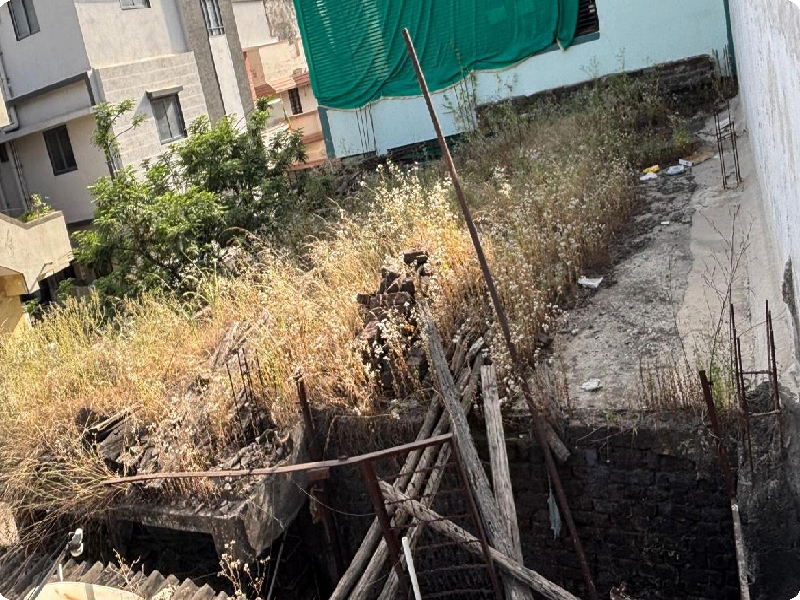
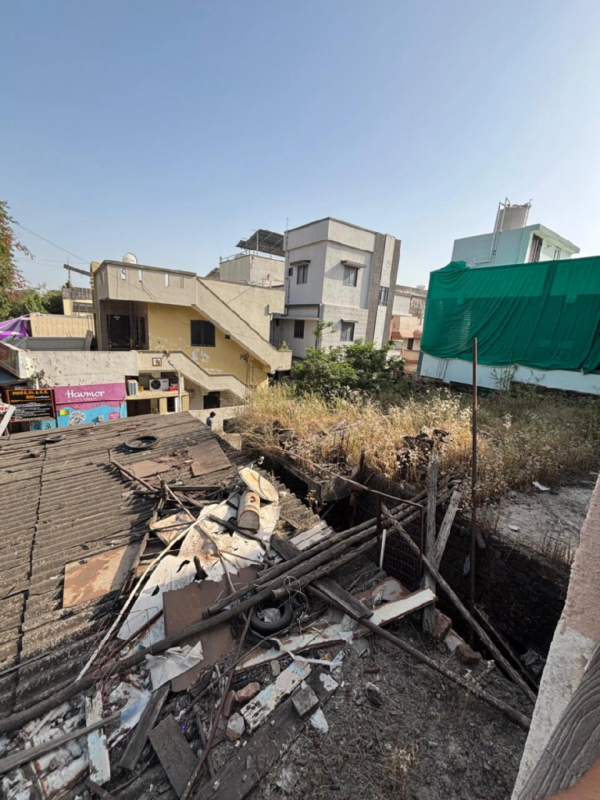
6. Roof Damaged by Plant Roots or Terrace Gardens
When plants or terrace gardens remain on a roof for a long time, their roots can penetrate the plaster and eventually reach the RCC slab. Over time, the roots create cracks, trap moisture, and allow rainwater to seep into the building, leading to dampness, leakage, and structural damage.
In such cases, applying waterproofing alone is not enough. The damaged surface must be repaired before installing a new waterproofing system.
Repair and Restoration Method
- Remove all plants, roots, and damaged plaster until a clean, solid roof surface is exposed.
- Rebuild the damaged areas with PCC (Plain Cement Concrete) to restore the correct roof slope and create a strong base.
Prepare the PCC mix by adding 10% WaterSeal PSV Waterproofing Chemical to the mixing water for improved bonding and water resistance.
Example: Add 10 Liters of WaterSeal PSV to 100 Liters of Water.
- Allow the PCC layer to cure for 4–6 days before waterproofing.
- After the surface has fully cured, apply WaterSeal PSV Premix Waterproofing System according to the recommended application method.
Why Surface Restoration Is Important
Plant roots weaken the roof structure by creating cracks and moisture pathways. Removing the damaged material and rebuilding the roof surface ensures proper waterproofing adhesion, restores structural strength, and provides long-lasting protection against future leakage.
Pro Tip: Never apply waterproofing over a roof damaged by plant roots. Always remove the vegetation and repair the surface first to achieve durable waterproofing results.
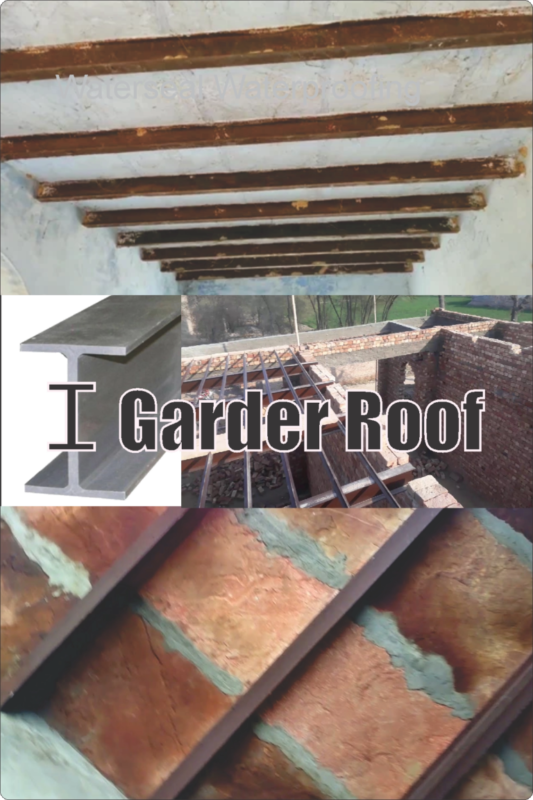
Need Waterproofing for an RCC Roof?
Protect your RCC beam–slab roof with WaterSeal PSV Waterproofing Chemical for long-lasting leak protection and durable waterproofing performance.
7. RCC Beam–Slab Roof Construction
Many older RCC roofs are built using a beam–slab construction system. Over time, the joints between the beams and slabs expand and contract due to temperature changes. These joints become weak and allow rainwater to seep into the building, causing dampness and roof leakage.
To achieve long-lasting waterproofing, these joints must be properly sealed before applying the waterproofing system.
Recommended Waterproofing Method
- Clean the roof surface thoroughly and remove all loose plaster, dust, dirt, and debris.
- Inspect the beam–slab joints and seal all visible cracks using a high-quality crack filling compound.
- Apply WaterSeal PSV Waterproofing Chemical over the entire roof surface according to the recommended application method.
- Apply the required number of waterproofing coats to create a continuous, flexible, and waterproof membrane.
- Allow each coat to dry completely before applying the next coat.
Why Beam–Slab Joint Treatment Is Important
The joints between RCC beams and slabs are common leakage points. Proper joint sealing prevents water from entering the structure, improves waterproofing performance, and extends the life of the roof.
Pro Tip: Pay special attention to beam joints and construction joints during waterproofing, as these areas are most vulnerable to future leakage.
🧩 Why This System Works
Beam–slab joints are the most critical leakage points in RCC roofs. By sealing the joints first and then applying a continuous waterproof layer, seepage is controlled effectively and future maintenance costs are reduced.
Conclusion
Choosing the right Waterproofing Solution for Building Conditions is the key to preventing roof leakage, dampness, and costly structural repairs. Every roof has different waterproofing requirements based on its age, construction type, cracks, slope, and existing condition. Selecting the right solution ensures better performance, longer service life, and reliable protection.
Before starting any waterproofing work, always inspect your roof carefully and identify its condition. Repair damaged areas first, then apply the most suitable waterproofing system to achieve long-lasting, leak-free results.
Need help selecting the right waterproofing solution for your roof? Our experts can recommend the best treatment based on your building’s conditio
FAQs on Choosing a Waterproofing Solution for Building Conditions
These FAQs will help you understand waterproofing solutions based on different roof and building conditions.
How do I choose the right Waterproofing Solution for Building Conditions?
Every roof has different waterproofing requirements based on its age, construction type, cracks, water ponding, joints, and existing condition. Inspecting the roof first helps you choose the most effective waterproofing solution for long-lasting protection.
Why is roof inspection important before waterproofing?
A roof inspection identifies cracks, damaged plaster, open joints, poor slope, and old waterproofing failures. Repairing these issues before waterproofing improves bonding and prevents future leakage.
What are the most common conditions found on old roofs?
Old roofs commonly suffer from damaged plaster, water ponding, open tile joints, parapet wall leakage, failed waterproofing coatings, plant root damage, and RCC beam–slab joint leakage.
Can waterproofing be applied over old waterproofing or damaged tiles?
No. Loose or damaged waterproofing layers, cracked tiles, and weak surfaces should be repaired or removed before applying a new waterproofing system to ensure proper adhesion and long-term performance.
Do I need a contractor, or can I apply waterproofing myself?
Minor waterproofing projects can often be completed using DIY waterproofing products by following the recommended application method. However, severe leakage, structural damage, or extensive roof repairs should be handled by an experienced waterproofing contractor.
Which waterproofing product is suitable for different roof conditions?
The right product depends on your roof’s condition. For terraces, RCC roofs, repaired surfaces, and many common waterproofing applications, WaterSeal PSV Waterproofing Chemical provides a durable and long-lasting waterproofing solution when applied correctly.